This is the tutorial on how to set up your Synology NAS based on DiskStation Manager (DSM) 5.1 version. The instructions were made for connection to the Swedish #3 server. Special thanks to @davmojo for providing these instructions.
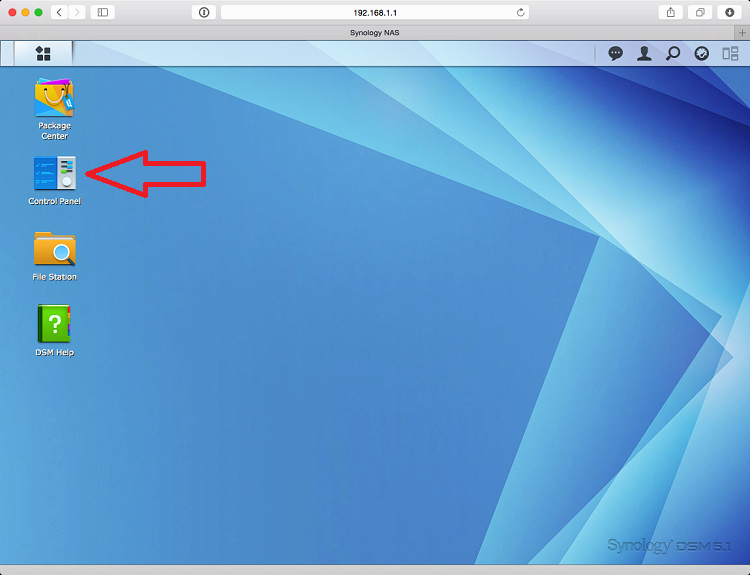
1. Login to your Synology NAS control panel.

2. Go to Control Panel.
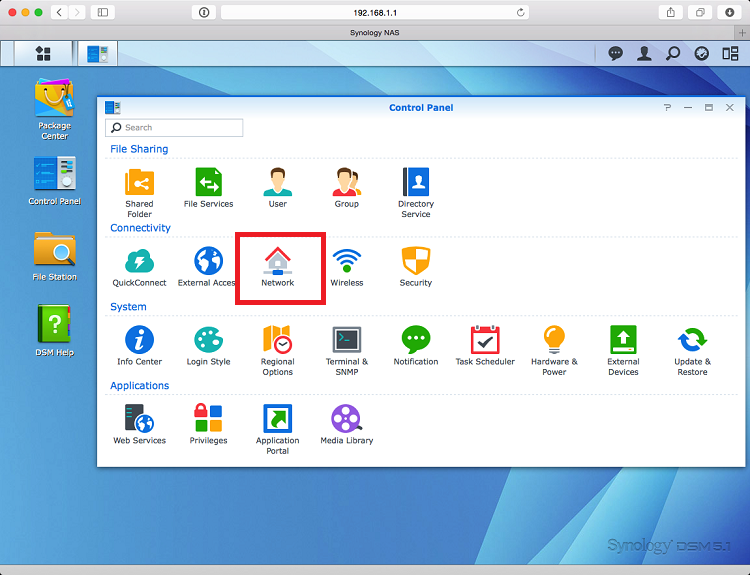
3. Go to Network.
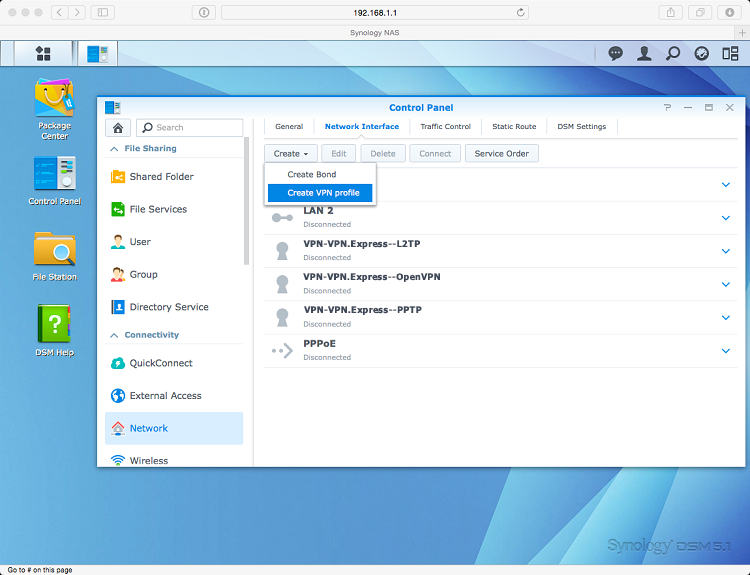
4. Create a new VPN Profile.
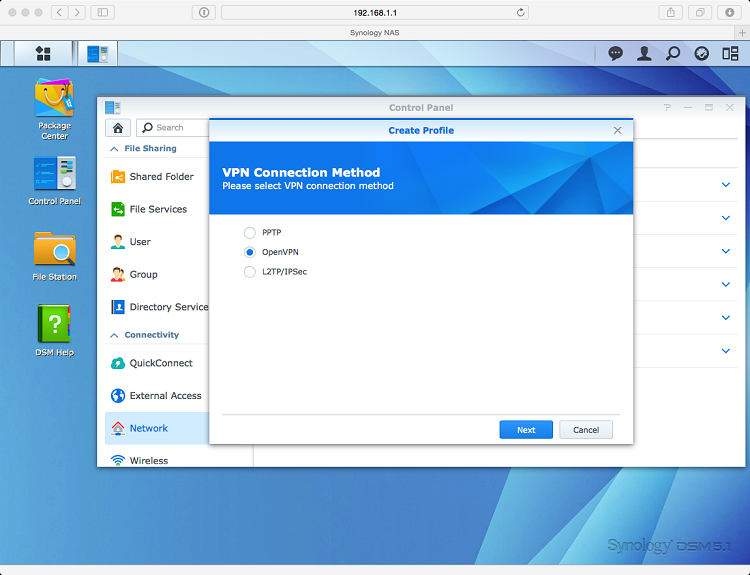
5. Choose OpenVPN option.
6. Download the latest CA certificates from this link and extract the package.
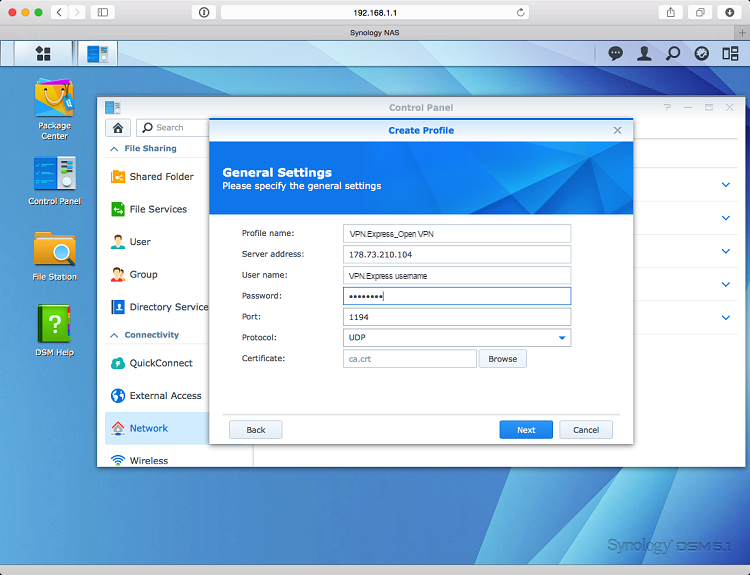
7. Return to your web browser and enter the following details:
Profile Name – choose any name you like;
Server Address – the VPNexpress server hostname or IP address;
User name – your VPNexpress username;
Password – your VPNexpress password;
Port – 1194 (recommended);
Protocol – UDP (recommended);
Cerificate – go to the folder where you have extracted the CA certificates and select the corresponding CA certificate to the server you will use.
Click Next.
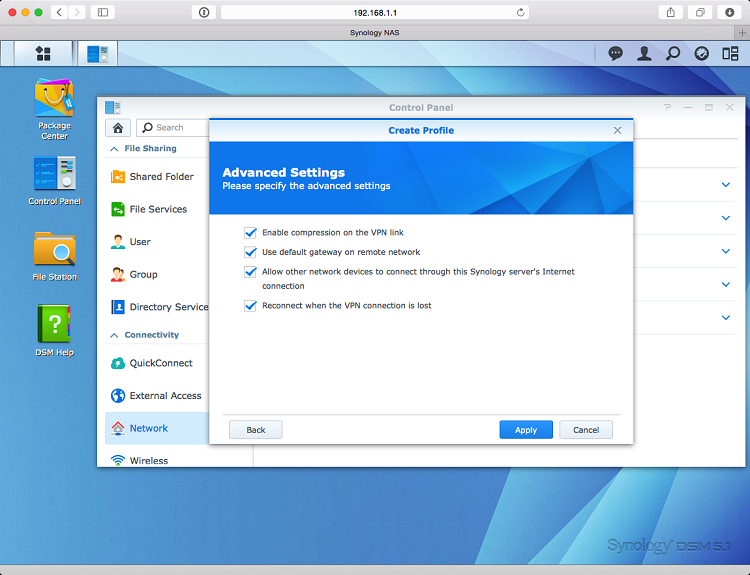
8. On the Advanced settings screen – enable all the options.
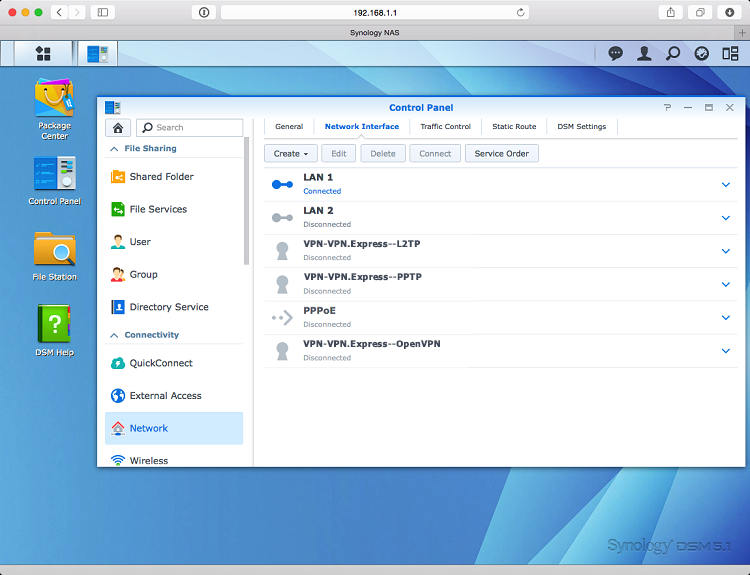
9. Click Apply and you will return to the Network Interface list.
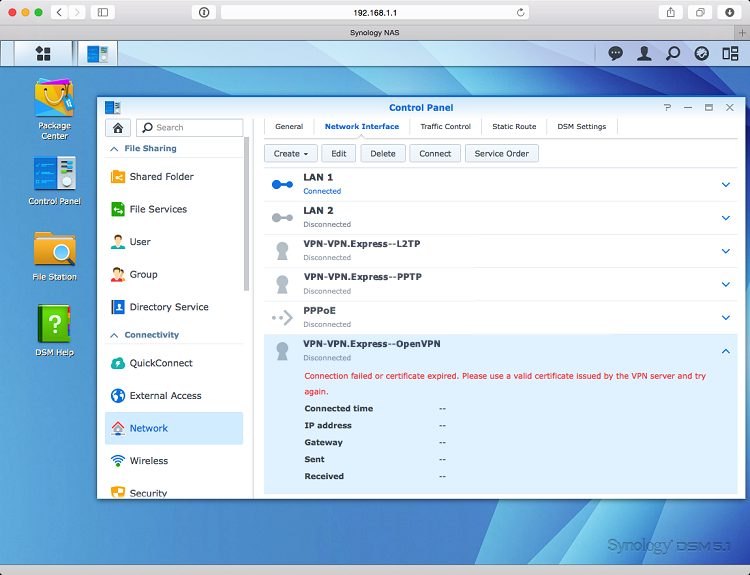
10. If you click the VPN Profile you have just created and click connect you will see the following error in red.
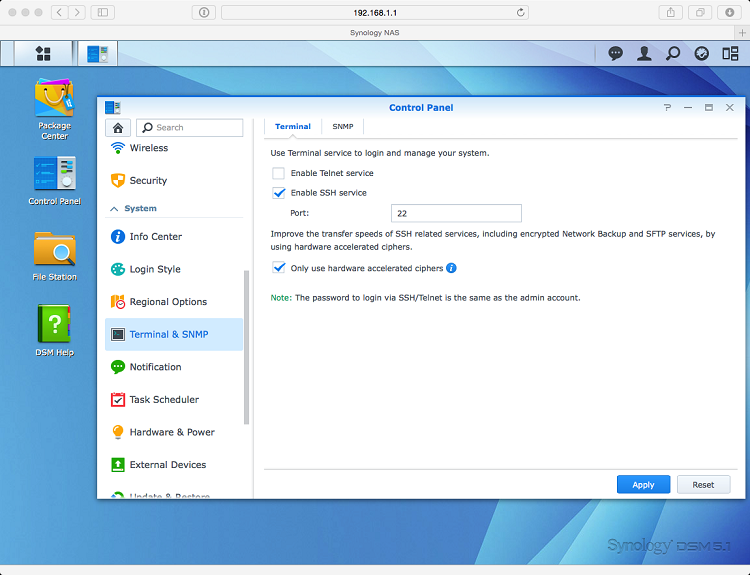
11. You will now need to manually edit the OpenVPN profile on your Synology NAS. To do so you need to SSH as root.
Firstly enable SSH from the Terminal & SNMP option.
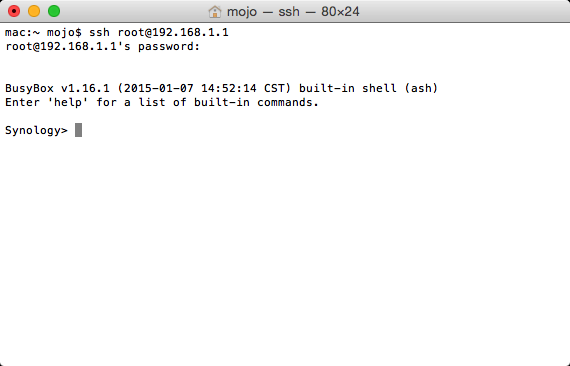
12. Now open your favorite terminal/ssh program (Mac OSX Terminal shown here) and type:
ssh root@(ip of your synology).
The root password is the password of your administrator user (you may have changed it when initializing your NAS).
13. Now you need to change directories. Type and then press enter at the end of the line:
cd /usr/syno/etc/synovpnclient/openvpn
ls -al
In the screenshot below you see three files:
– ca_.crt is the certificate you have uploaded (ca.crt);
– client_ is the file containing the OpenVPN configuration;
– ovpnclient.conf contains the Synology setup for OpenVPN connections.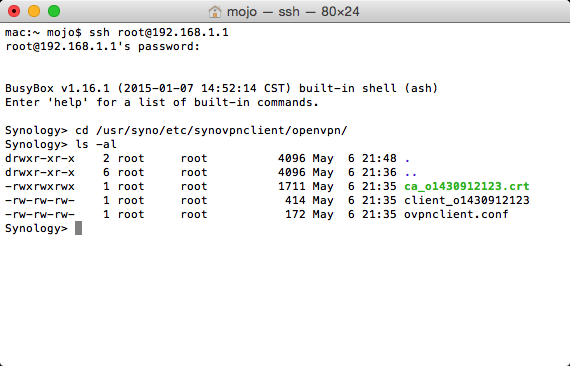
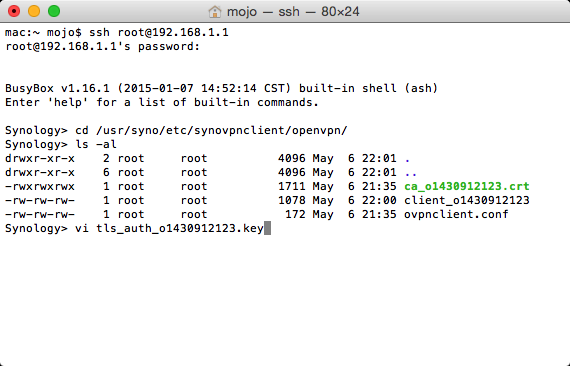
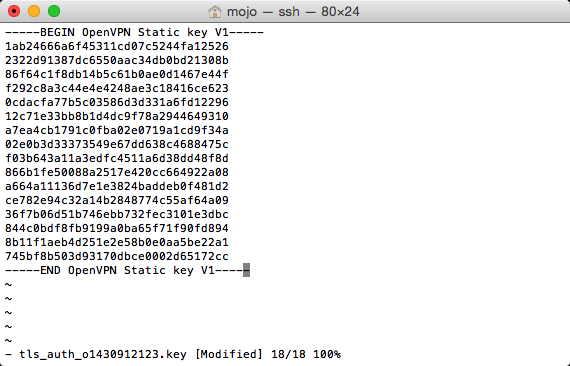
14. You need to create a new file which contains the tls-auth key.
Using vi is the easiest way to do this. Type: (replace with the actual connection id)
vi tls_auth_.key
15. Return to the directory where you have extracted CA certificates. You can also see the TLS-AUTH.key files there. Select the corresponding TLS-AUTH.key file to the server you are setting up the connection with and open it with a text editor program. Copy all the text in the file.
16. Open the terminal window again. Press A and then paste the text you have copied from the TLS-auth.key file. It should look similar to the text below.
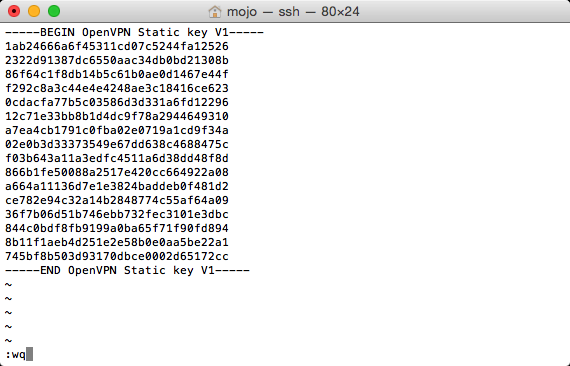
17. Press Escape and then type :wq
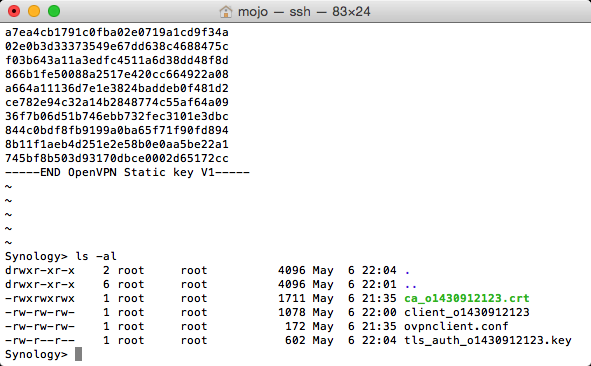
18. If you would list the content of the directory using ls -al command you should see something similar to the image below.
19. Now you need to finish the client_(connection_id) file. Using vi open the file and add the following (note: remember to replace the TLS-AUTH.key file with the name of the keyfile you have created earlier):
# _ _ ___ ______ _ _
# | | | ___ _ __ __| / / _ | | |
# | | |/ _ | ‘__/ _` | / /| |_) | | |
# | | | (_) | | | (_| | V / | __/| | |
# |_| _|___/|_| __,_| _/ |_| |_| _|
#
cipher AES-256-CBC
remote-cert-tls server
tls-auth tls_auth_o1430912123.key 1
tun-mtu 1500
tun-mtu-extra 32
mssfix 1450
persist-key
persist-tun
ping 15
ping-restart 0
ping-timer-rem
# uncomment to log
# log-append /volume1/tmp/VPNexpress.log
It should look similar to the image below.

20. Save the file by pressing Escape, typing :wq
21. Return to your web browser window. Click Connect and you will see the Connecting sign. Please wait for up to 2 minutes.
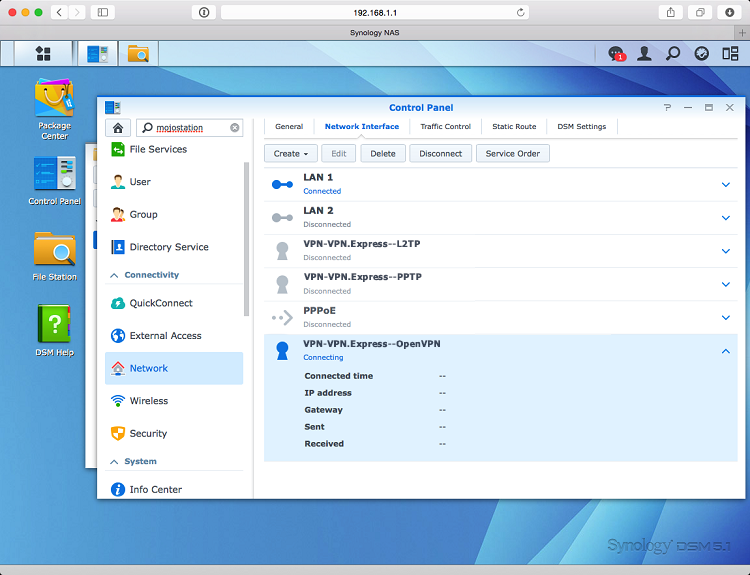
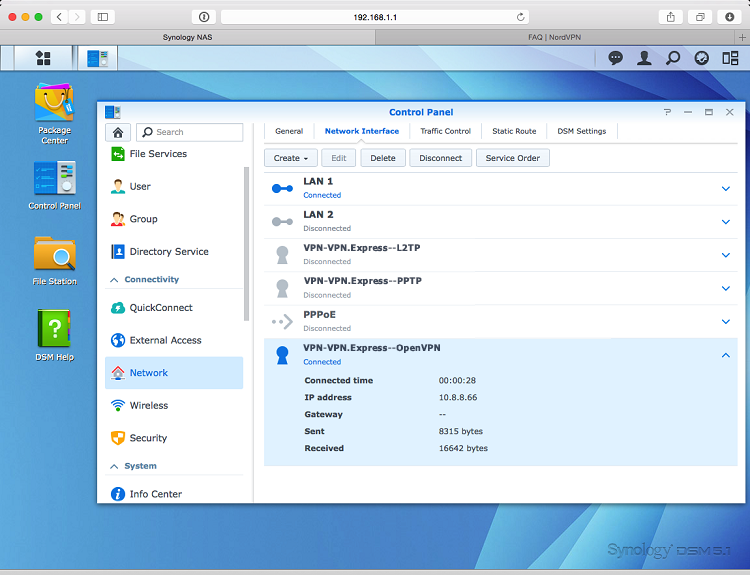
22. If everything is done properly you will be connected to VPN.
23. To disconnect simply click on Disconnect button in the Synology Network list.